Spring is the most important season in beekeeping. As temperatures rise and flowers begin to bloom, your colony shifts from winter survival mode into rapid growth. Proper spring preparation can mean the difference between a struggling hive and a thriving honey-producing powerhouse.
At BeeNewz, we believe that small eco-conscious actions create powerful ripple effects. Supporting pollinators is one of the most impactful steps you can take for biodiversity, food security, and environmental balance.
Let’s walk through how to prepare your hive for a successful spring.
Preparing Your Hive for Spring: Start with Intention and Planning
Spring is not just another season in beekeeping — it is the turning point. As temperatures rise and blossoms begin to open, your colony transitions from quiet winter survival into rapid expansion. The queen increases egg production, worker bees prepare for intense foraging, and the entire hive shifts into growth mode. What you do — or fail to do — during this short window can determine whether your colony merely survives or truly thrives.
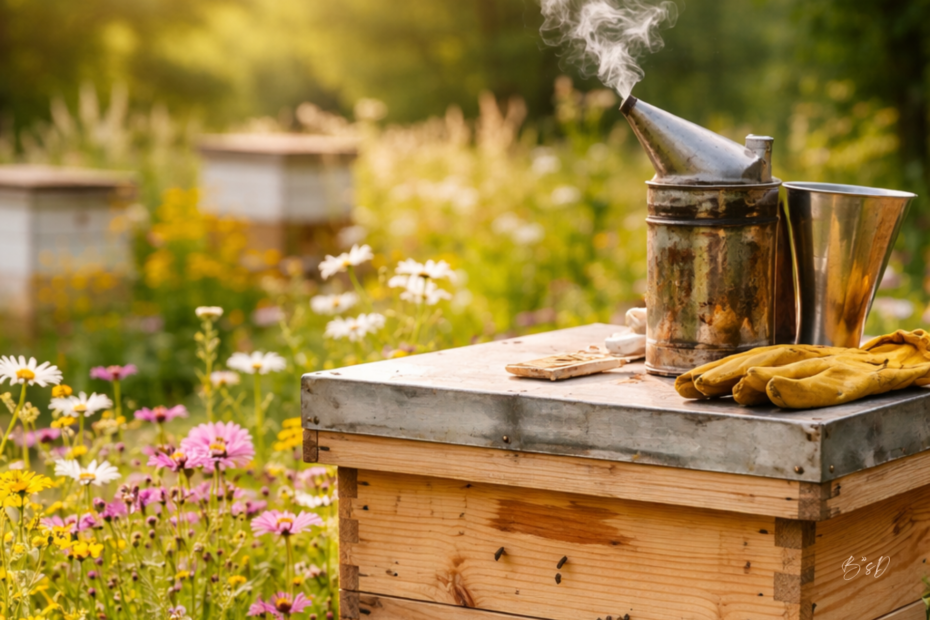
If this is the first time you will open your hive after winter, preparation begins before you even lift the lid. Choose a calm, sunny spring day with temperatures around 60°F (15°C) or higher. Avoid windy, rainy, or cold mornings. Bees are naturally calmer when foragers are out collecting nectar, typically mid-morning to early afternoon. Selecting the right day reduces colony stress and allows you to inspect with clarity and confidence.
Planning is essential. Lay out your tools in advance. Ensure your protective suit is secure, your smoker is lit and producing cool, steady smoke, and your hive tool is within reach. Move slowly and deliberately. The first spring inspection should never feel rushed. Approach it with anticipation and respect — you are entering a living, organized community that has worked all winter to survive.
Spring is the most important season in beekeeping because it sets the foundation for honey production, swarm prevention, and overall colony health. A careful inspection allows you to evaluate brood patterns, confirm the queen is laying, check remaining honey stores, and detect early signs of pests or disease before they escalate.
At BeeNewz, we believe that small eco-conscious actions create powerful ripple effects. Supporting pollinators is one of the most impactful steps you can take for biodiversity, food security, and environmental balance. By preparing thoughtfully and inspecting responsibly, you’re not just managing a hive — you’re contributing to a healthier ecosystem.
Let’s walk step-by-step through how to prepare your hive for a successful spring season.
1. Inspect Your Hive Early (But Carefully)
the turning point. As temperatures rise and blossoms begin to open, your colony transitions from quiet winter survival into rapid expansion. The queen increases egg production, worker bees prepare for intense foraging, and the entire hive shifts into growth mode. What you do during this short window can determine whether your colony merely survives or truly thrives.
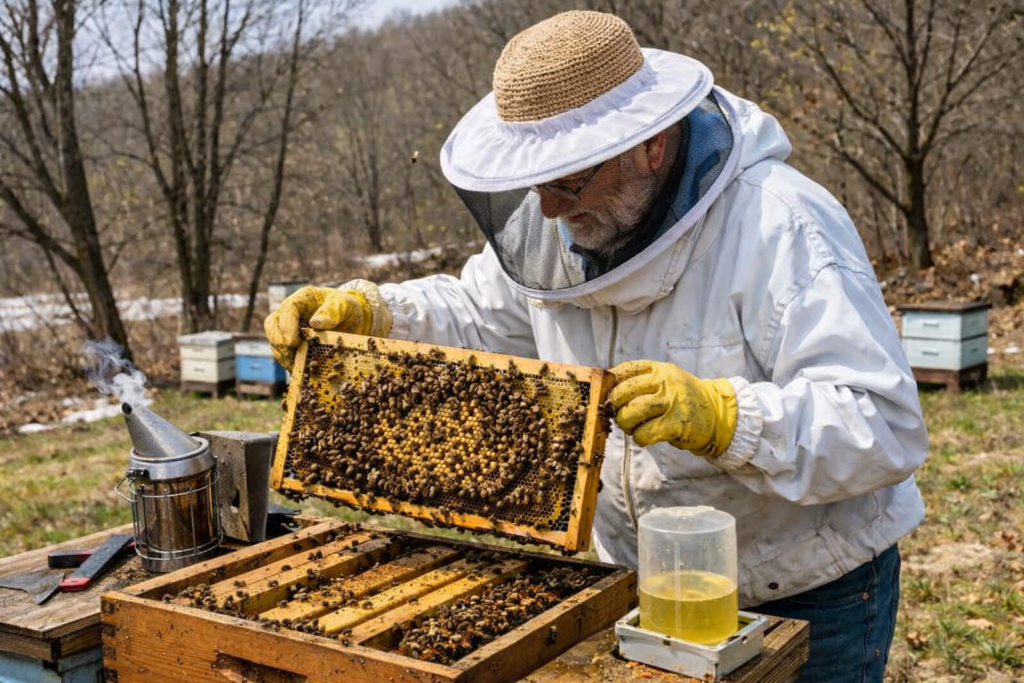
If this is your first time opening the hive after winter, preparation must begin days before inspection. Monitor the weather forecast and choose a calm, dry, sunny day with minimal wind. Organize your tools in advance, check your protective gear for any damage, and practice lighting your smoker properly so you are confident and steady when the moment arrives. Preparation builds confidence — and confident movements help keep bees calm.
Once you are set, and as soon as daytime temperatures consistently reach around 60°F (15°C), it’s time for your first spring inspection.
Approach the hive slowly and with intention. Bees are typically calmer mid-morning to early afternoon when foragers are out collecting nectar. Use gentle puffs of cool smoke at the entrance and under the lid, then carefully remove frames to evaluate brood pattern, confirm the queen is laying, assess remaining honey stores, and check for signs of mites or disease. Move deliberately and avoid rushing — this is a health check, not just a routine look inside.
Spring is the most important season in beekeeping because it sets the foundation for honey production, swarm prevention, and colony strength throughout the year. A thoughtful inspection allows you to detect problems early and support your hive before peak nectar flow begins.
At BeeNewz, we believe that small eco-conscious actions create powerful ripple effects. Supporting pollinators is one of the most impactful steps you can take for biodiversity, food security, and environmental balance. When you prepare responsibly, you are not just managing bees — you are protecting an ecosystem.
During this inspection, check:
- Is the queen laying eggs?
- Are there healthy brood patterns?
- Does the hive have enough food stores?
- Are there signs of pests or disease?
To perform your first spring inspection safely and effectively, having the proper equipment ready beforehand makes all the difference. The right protective clothing and tools not only protect you but also reduce stress on the colony by allowing you to work calmly and efficiently.
📍 Recommended Equipment for Early Spring Inspections
Recommended beginner beekeeping suit: Professional Beekeeping Suit with Ventilated Hood
Essential hive inspection tools: 9 Pcs Beekeeping Tools Kit with Organizer Tote for Beekeepers
Complete smoker kit for calm and controlled hive management Honey Lake Bee Smoker Kit
Choosing quality tools is an investment in both your safety and your bees’ well-being. Also keep in mind to keep inspections short to avoid chilling the brood.
2. Clean and Repair Equipment
Winter can be harsh on wooden hive boxes and frames. Months of moisture, fluctuating temperatures, condensation buildup, and limited ventilation can weaken materials and create hidden damage. Even the strongest equipment can shift, crack, warp, or develop mold after enduring cold winds and damp conditions.
Spring is not only about inspecting the bees — it is also about restoring and strengthening the home that protects them. Think of it as seasonal renewal for the entire colony structure. A healthy hive begins with a solid, dry, well-maintained foundation.
Spring is the time to:
- Check for cracked, warped, or rotting wood on hive bodies and supers
- Remove moldy or damaged frames
- Scrape excess propolis buildup
- Replace old or broken foundation
- Ensure the hive entrance is clear and unobstructed
- Confirm proper ventilation to reduce moisture accumulation
Take your time during this process. Small repairs now can prevent major colony stress later. Bees thrive in clean, dry, stable environments. When their physical structure is secure, they can focus their energy on brood production, nectar collection, and population growth instead of survival recovery.
This is also the perfect moment to evaluate whether your hive stand is stable and elevated enough to prevent ground moisture from affecting the base. A slight tilt forward helps rainwater drain away from the entrance — a simple but powerful detail many beginners overlook.
Maintaining hive equipment in early spring does not require complicated tools — but it does require the right ones. Using proper wood treatment supplies, quality replacement frames, and reliable repair kits helps extend the life of your hive boxes while protecting your bees from unnecessary stress.
Preparing your materials ahead of time allows you to focus calmly on inspection day instead of scrambling for supplies. A well-maintained hive structure supports colony growth, reduces moisture risk, and creates a stable environment for brood development.
📍 Recommended Spring Hive Maintenance Equipment
- Wood treatment tools for sealing and protecting hive boxes Stainless Steel Hive Scraper Tools
- Replacement frames and foundation sheets Beehive Waxed Coated Foundation Sheet
- Complete hive repair kit for beginners Beekeeping Supplies Bee Keeper Starting Kit
Choosing durable, bee-safe materials ensures your hive remains strong throughout the entire nectar season. Healthy bees need clean equipment to thrive.
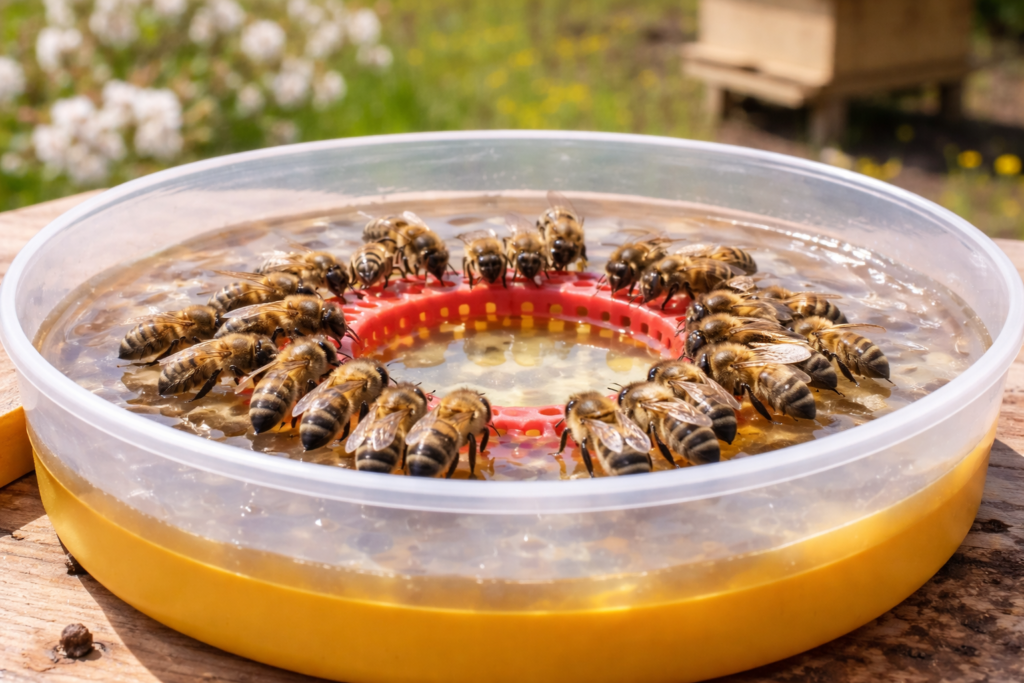
3. Feed If Necessary
Even though spring flowers bloom, early nectar flow may not be enough. If your colony has low honey stores, Early spring weather can be unpredictable, and blooming patterns may vary depending on your region. If honey stores are low or frames feel noticeably light during inspection, supplemental feeding may be necessary to prevent starvation and support healthy brood expansion. A simple 1:1 sugar-to-water syrup mimics early nectar flow and encourages the queen to continue laying. The goal is not to replace natural forage, but to provide temporary support until flowers are consistently producing nectar.
Always feed responsibly. Monitor consumption levels and reduce feeding once natural nectar becomes abundant. Overfeeding can limit foraging behavior and affect hive balance, so observation is key.
📍 Recommended Spring Feeding Supplies
Having the proper feeder setup prevents drowning, reduces robbing behavior, and keeps the hive clean during supplementation.
- Spring hive top feeder Honey Bees Feeders Equipment
- Entrance feeder for small colonies Front Entrance Honey Bee Feeder and Lid
- Organic cane sugar for bee syrup preparation Wholesome Sweeteners 10-Pound Organic Cane Sugar, Fair Trade
Using well-designed feeders helps maintain colony calmness while ensuring bees can access syrup safely.
4. Prevent Swarming Before It Starts
Swarming is a natural and healthy reproductive behavior of honeybee colonies — but for beekeepers, it can mean losing half of your workforce right at the start of peak nectar season. When a colony becomes overcrowded in spring, the queen and a large portion of worker bees may leave to establish a new hive elsewhere. While this is beneficial in the wild, it significantly reduces honey production and weakens the original colony.
Spring’s rapid brood expansion can quickly fill available space. If frames are packed with brood, nectar, and pollen, the colony may begin building swarm cells in preparation to divide. Preventing swarming before it begins is far easier than trying to manage it after swarm cells are already capped.
Early action is key. Providing additional space, removing overcrowded frames, and closely monitoring brood patterns help maintain colony balance. Strong colonies need room to grow. When bees feel spacious and organized, they are far less likely to trigger swarm behavior.
Swarm prevention is not about stopping nature — it is about guiding growth responsibly so the colony remains strong, productive, and stable throughout the season.
Managing swarm risk requires planning and proper equipment. Having extra boxes and frames ready before congestion occurs allows you to act immediately instead of reacting too late.
📍 Recommended Equipment for Swarm Prevention
- Deep or medium supers for adding space (Insert Amazon affiliate link here)
- Extra frames with foundation (Insert Amazon affiliate link here)
- Queen excluder for controlled expansion (Insert Amazon affiliate link here)
- Complete swarm management kit for beginners (Insert Amazon affiliate link here)
Being prepared ahead of time protects both your honey yield and the overall health of your colony.
5. Monitor for Varroa Mites (A Serious Hive Threat)
Varroa mites are one of the most destructive parasites affecting honeybee colonies worldwide. Often described as a “plague” of modern beekeeping, these tiny reddish-brown mites attach themselves to adult bees and developing brood, feeding on their fat bodies (a vital tissue for immunity and energy storage). As they feed, they weaken individual bees and spread dangerous viruses such as Deformed Wing Virus (DWV).
Left untreated, a Varroa infestation can silently collapse an entire colony — sometimes within a single season.
Spring is a critical time to monitor for mites because colony populations are expanding rapidly. As brood increases, so do mite reproduction opportunities. If you ignore mite levels early in the season, numbers can explode by late summer, leading to weakened winter bees and eventual colony loss.
Monitoring is not optional — it is responsible beekeeping.

Why Varroa Control Is So Important
• Mites reproduce inside capped brood cells
• They weaken developing bees before they even emerge
• They transmit viruses that deform wings and shorten lifespan
• They reduce overall colony immunity
• They are the leading cause of colony collapse in managed hives
Healthy-looking bees can still carry dangerous mite loads. That’s why visual inspection alone is not enough.
How to Monitor for Varroa Mites
The most reliable methods include:
1. Alcohol Wash (Most Accurate)
Collect approximately 300 bees from a brood frame and wash them in alcohol to count mite fall. This method provides a precise infestation percentage.
2. Sugar Roll (Less Invasive)
Bees are coated in powdered sugar to dislodge mites, which are then counted. Bees survive this method.
3. Sticky Boards
Placed under screened bottom boards to measure natural mite drop over 24–72 hours.
Spring threshold guideline:
If infestation reaches about 2–3%, treatment should be considered.
Solutions for Varroa Control
Effective mite management combines monitoring and timely treatment.
🧪 Organic & Chemical Treatments
• Formic acid pads (can penetrate capped brood)
• Oxalic acid vaporization or dribble
• Thymol-based treatments
• Approved synthetic miticides (used carefully and rotated)
Always follow label instructions and temperature guidelines. Some treatments are temperature-sensitive and should not be applied during honey flow intended for harvest.
Integrated Pest Management (IPM) Strategies
BeeNewz promotes responsible, integrated approaches:
• Drone brood removal (mites prefer drone cells)
• Screened bottom boards
• Splitting strong colonies to interrupt brood cycle
• Requeening with mite-resistant genetics
• Maintaining strong, well-fed colonies
Strong colonies are more resilient, but even strong colonies need monitoring.
Important Reminder
Varroa mites do not disappear on their own. Ignoring them does not make them harmless. Consistent testing throughout spring and summer is one of the most responsible actions a beekeeper can take to protect pollinators.
Monitoring mites protects:
• Your colony
• Your honey production
• Local wild bee populations
• Regional apiary health
At BeeNewz, we believe sustainable beekeeping includes proactive pest management. Healthy bees create thriving ecosystems.
Tools That Make Varroa Monitoring Easier
Monitoring for Varroa mites requires consistency — and consistency is much easier when you have the right tools prepared ahead of time. Reliable testing equipment not only improves accuracy but also reduces stress on the colony during sampling. Investing in proper monitoring supplies allows you to track infestation levels confidently and make informed treatment decisions rather than guessing.
📍 Recommended Varroa Monitoring Tools
- Alcohol wash Varroa testing kit (Insert Amazon affiliate link here)
- Powdered sugar roll test kit (Insert Amazon affiliate link here)
- Sticky board inserts for screened bottom boards (Insert Amazon affiliate link here)
- Protective gloves and measuring jars for safe sampling (Insert Amazon affiliate link here)
Using standardized kits ensures you are collecting the correct bee sample size and calculating mite percentages properly — which is critical when deciding whether treatment is necessary.
Responsible monitoring protects more than your own hive. It supports the health of surrounding apiaries and wild pollinators by reducing regional mite pressure.
6. Plant Pollinator-Friendly Flowers
Supporting bees goes beyond the hive.
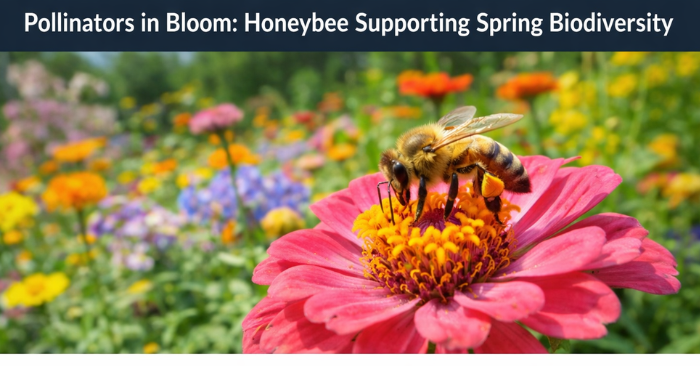
Healthy honeybee colonies benefit not only from regular Varroa mite checks and hive management, but also from abundant nectar and pollen sources in the surrounding landscape. Bees are essential pollinators that support food crops, wildflowers, and garden plants, playing a vital role in ecosystem health and biodiversity.
By planting bee-friendly plants near your apiary or garden, you help ensure a reliable source of nutrition for your colony throughout the seasons. Flowers rich in nectar and pollen — like lavender, calendula, sunflowers, zinnias, bee balm, rosemary, thyme, and clover — attract honeybees and other pollinators, boosting garden productivity and natural beauty.
For more ideas on creating a vibrant, bee-supporting garden and why pollinators matter, check out Why Bees Are Important on BeeNewz. (link to https://beenewz.com/bee-friendly-garden-why-bees-are-important/)
Final Thoughts
Preparing for spring beekeeping is about observation, timing, and gentle support. Every inspection, every planted flower, and every mindful decision contributes to environmental sustainability.
At BeeNewz, our mission is simple: inspire change, one small step at a time. Supporting pollinators is one of the most powerful eco-conscious actions you can take this season.
Healthy bees mean healthy ecosystems — and that means a healthier planet for all of us.
Discover more from Bee Newz
Subscribe to get the latest posts sent to your email.