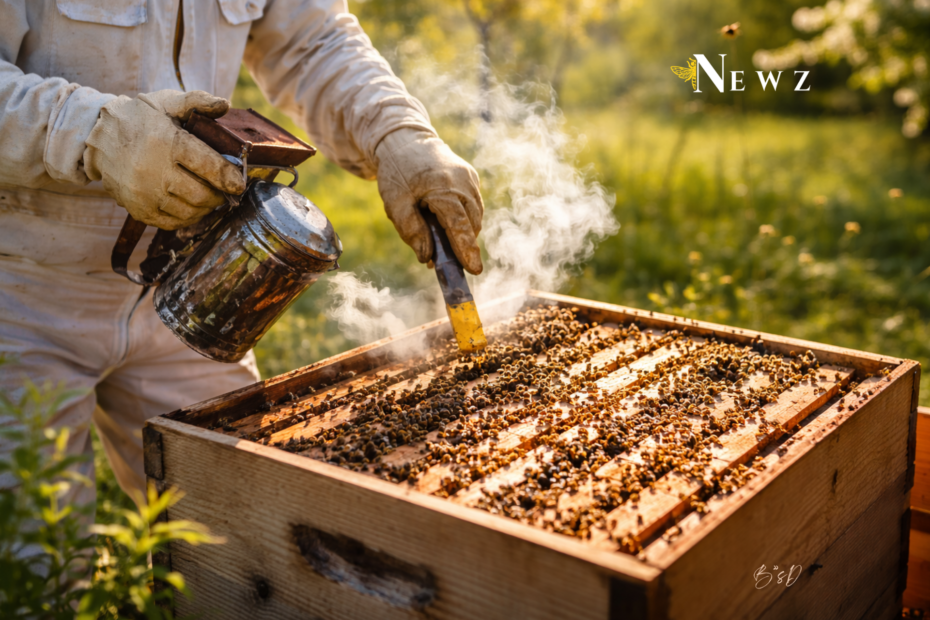
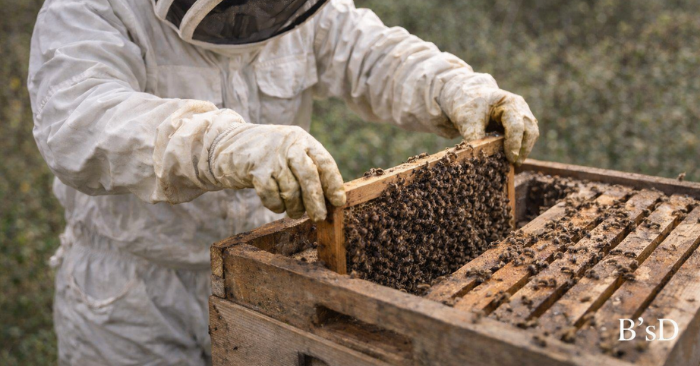
Get ready because Spring is the most important season in beekeeping. After months of winter survival, honey bee colonies begin expanding rapidly, brood production increases, and nectar flows start appearing across the landscape. A careful spring hive inspection helps ensure your colony is healthy, productive, and ready for the busy months ahead.
However, successful inspections require preparation and the right tools. Proper equipment helps you work efficiently while minimizing stress on the colony and protecting yourself from stings. As winter transitions into spring, preparation becomes just as important as the inspection itself. Entering the hive with the right tools—and knowing how to use them properly—helps reduce stress on the colony and allows you to work with confidence.
For beginners especially, having reliable, well-designed equipment can make a significant difference in both safety and efficiency. Rather than viewing tools as optional, think of them as part of a system that supports calm, controlled hive management.
Below, we’ll explore essential tools and how to use them effectively during your first spring inspection.
In this guide, we will explore the essential tools every beekeeper should bring when opening a hive in spring, along with helpful equipment recommendations to make inspections easier and safer.
Why Spring Hive Inspections Matter
During the first warm days of spring, beekeepers typically perform their first full hive inspection to evaluate colony health. This inspection allows you to check:
- The presence and performance of the queen
- Brood pattern and population growth
- Food stores (honey and pollen)
- Signs of pests or diseases
- Early swarm preparation
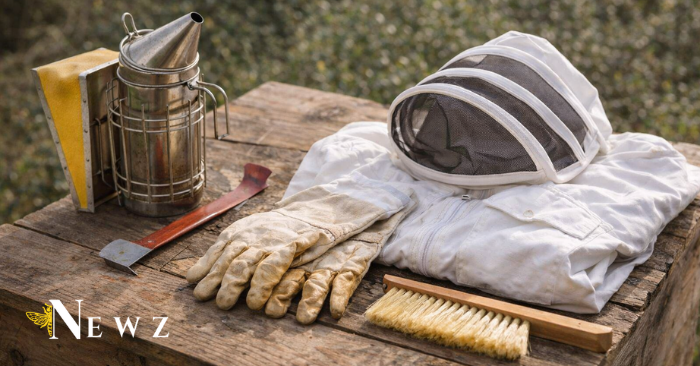
Having the proper equipment makes these inspections smooth and safe. The most essential tools include a smoker, hive tool, protective gear, and a bee brush.
1. Bee Smoker – Calm Your Colony
Why It’s Essential
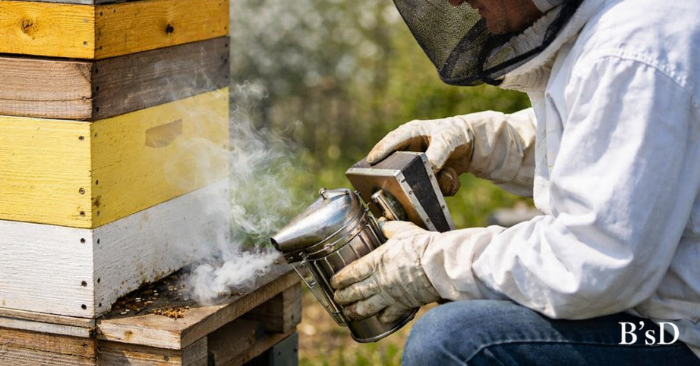
A bee smoker produces cool smoke that helps calm the bees during hive inspections. Smoke interferes with the bees’ alarm pheromones and encourages them to focus on feeding rather than defending the hive. Using a smoker properly reduces defensive behavior and allows you to work more comfortably around the colony.
How to Use a Smoker Properly
Using a smoker is not about producing large amounts of smoke—it’s about control and timing.
Step-by-Step Technique:
1️⃣ Light the smoker properly
Use natural fuel such as pine needles, burlap, wood shavings, or dried leaves. The goal is to create cool, white smoke—not hot or harsh smoke.
2️⃣ Start with a few gentle puffs at the entrance
Before opening the hive, lightly puff smoke at the entrance. This signals the colony and begins calming defensive behavior.
3️⃣ Wait a few seconds
Give the bees time to respond. Rushing this step can make the colony more reactive.
4️⃣ Apply minimal smoke under the lid
After opening the hive, apply 1–2 gentle puffs under the cover—not excessive smoke.
5️⃣ Use smoke sparingly during inspection
Only add more smoke if bees become agitated. Over-smoking can stress the colony and disrupt normal behavior.
Recommended item to search on Amazon:
- Stainless Steel Bee Smoker with Heat Shield
- Heat shield protection
- Stainless steel body
- Large fuel chamber
- Durable smoker with protective guard and bellows
⚠️ Common Mistakes to Avoid
- Using too much smoke
- Producing hot smoke instead of cool smoke
- Constantly puffing during inspection
- Not checking fuel before starting
These smokers are widely used by both hobbyists and professional beekeepers.
2. Hive Tool – The Beekeeper’s Most Used Tool
Why It’s Essential
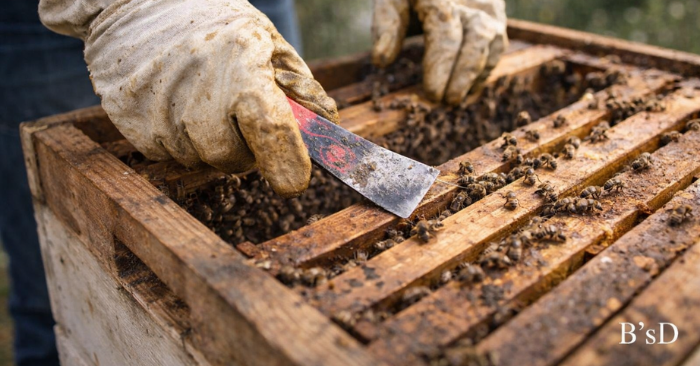
Among all beekeeping equipment, the hive tool is often the most frequently used—and the most underestimated. While smokers calm the colony and protective gear shields the beekeeper, the hive tool is what makes inspection possible. It serves as the primary instrument for opening the hive, separating frames, and navigating the intricate structure that bees naturally seal with propolis.
Inside a functioning hive, nearly every surface is bonded together with this sticky resin. Over time, boxes, frames, and covers become tightly sealed, making it nearly impossible to work without a proper tool. The hive tool provides the leverage and precision needed to gently break these seals without damaging the wooden components or disturbing the colony more than necessary.
More than just a simple metal bar, the hive tool reflects a key principle of beekeeping: working with control and intention. Each movement—lifting, prying, scraping—should be deliberate and minimal. A well-handled hive tool allows the beekeeper to move through the hive smoothly, reducing stress on the bees while maintaining the integrity of the colony’s structure.
For beginners, mastering the hive tool is one of the first steps toward confident beekeeping. With practice, it becomes second nature—an essential companion in every inspection, from early spring evaluations to peak honey flow and beyond.
A hive tool allows you to:
Hive tools are considered one of the most essential pieces of equipment during hive inspections.
- Pry open hive boxes
- Lift frames safely
- Scrape propolis or wax
- Remove pests or debris
Recommended item to search on Amazon:
- J-Hook Stainless Steel Hive Tool
Benefits:
- Durable stainless steel
- J-hook frame lifter
- Multipurpose scraping edge
Many beekeepers carry two hive tools during inspections.
3. Bee Brush – Gently Move Bees
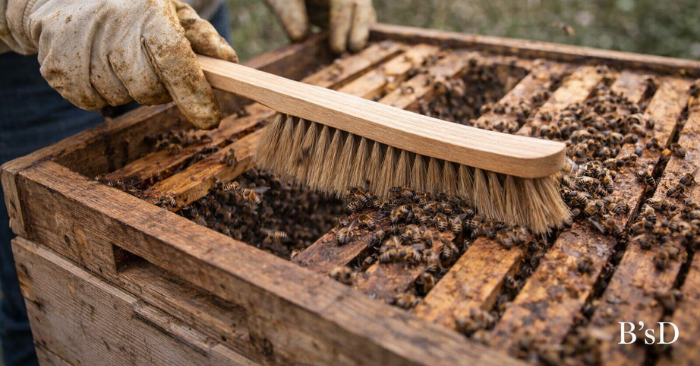
Among the more delicate tools in a beekeeper’s kit, the bee brush plays a unique role: it allows for gentle interaction with the colony when physical contact is unavoidable. Unlike the hive tool, which provides leverage, or the smoker, which influences behavior, the bee brush is designed for precision and care.
During inspections, bees often remain on frames, edges, or surfaces that need to be cleared for closer observation. The bee brush offers a way to move them aside without causing harm, using soft bristles that minimize stress and disturbance. When used properly, it supports one of the most important principles in beekeeping—working with the colony, not against it.
However, effective use requires patience and a light touch. Bees are highly sensitive to vibration and pressure, and rough handling can trigger defensive behavior. The brush should be used sparingly and only when necessary, allowing the natural flow of the hive to remain as undisturbed as possible.
For beginners, mastering the bee brush is less about technique and more about awareness—understanding when to intervene and when to let the bees move on their own.
Why It’s Important
During an inspection, bees often cluster on frames you need to examine. A bee brush allows you to gently move bees away without harming them.
- Gently removes bees from frames or hive surfaces
- Helps prevent accidental injury to bees during inspections
- Allows clearer visibility when checking brood and honey stores
- Supports calm and controlled hive management
Use it to:
- Clear bees from frames
- Remove bees during honey harvest
- Safely inspect brood cells
A soft bee brush helps reduce injuries to bees while keeping your inspection organized.
Look for:
- Soft natural bristles
- Comfortable wooden handle
- Gentle bee-safe design
4. Beekeeping Suit and Gloves
Protective gear is often the first thing people associate with beekeeping—and for good reason. A well-designed beekeeping suit and gloves provide a layer of safety that allows the beekeeper to move calmly and confidently within the hive environment.
While experienced beekeepers may sometimes work with minimal protection, beginners benefit greatly from full coverage. Confidence plays a critical role during hive inspections; when you feel protected, your movements become slower, more deliberate, and less reactive—qualities that help keep the colony calm.
A proper suit creates a physical barrier against stings while still allowing ventilation and mobility. The veil protects the face and neck—areas bees are naturally drawn to—while gloves shield the hands during frame handling and hive adjustments. Together, they form a system that supports both safety and control.
However, protective gear is not meant to replace technique. Calm movements, proper smoker use, and awareness of bee behavior remain essential. The goal is not to eliminate all risk, but to create an environment where both beekeeper and colony can interact with minimal stress.
Why Protection Matters
While experienced beekeepers sometimes work without full suits, protective gear is strongly recommended—especially for beginners.
- Protects against stings during hive inspections
- Builds confidence for beginners
- Allows steady, controlled movements
- Reduces sudden reactions that may disturb the colony
- Protects sensitive areas like face, neck, and hands
Recommended item to search on Amazon:
- Breathable mesh fabric
- Elastic cuffs
- Removable veil
Ventilated suits are especially helpful in warm climates.
5. Frame Grip – Lift Frames Safely
Protective gear is often the first thing people associate with beekeeping—and for good reason. A well-designed beekeeping suit and gloves provide a layer of safety that allows the beekeeper to move calmly and confidently within the hive environment.
While experienced beekeepers may sometimes work with minimal protection, beginners benefit greatly from full coverage. Confidence plays a critical role during hive inspections; when you feel protected, your movements become slower, more deliberate, and less reactive—qualities that help keep the colony calm.
A proper suit creates a physical barrier against stings while still allowing ventilation and mobility. The veil protects the face and neck—areas bees are naturally drawn to—while gloves shield the hands during frame handling and hive adjustments. Together, they form a system that supports both safety and control.
However, protective gear is not meant to replace technique. Calm movements, proper smoker use, and awareness of bee behavior remain essential. The goal is not to eliminate all risk, but to create an environment where both beekeeper and colony can interact with minimal stress.
This tool helps you:
- Lift heavy honey frames
- Maintain control during inspections
- Reduce accidental damage to comb
Frame grips are particularly useful when working with full honey supers.
🌿 Pro Tip (Editorial Touch)
Well-fitted protective gear should feel like support—not restriction. When your suit allows freedom of movement and clear visibility, you’re able to focus fully on the hive rather than your own safety.
6. Beekeeping Starter Tool Kits
If you are just starting beekeeping, a complete tool kit can provide excellent value. Some kits include multiple inspection tools such as smokers, brushes, hive tools, gloves, and queen marking tools.
These kits are convenient because they provide all the basic tools needed for hive inspections in one package.
Typical kits include:
- Bee smoker
- Hive tool
- Bee brush
- Gloves
- Queen marking cage
- Frame grip
For beginners, a well-assembled starter kit can remove much of the uncertainty that comes with preparing for your first hive inspection. Instead of gathering tools piece by piece, these kits provide a balanced combination of essential equipment designed to work together.
Final Thoughts
Spring hive inspections are one of the most rewarding moments in beekeeping. Watching a colony emerge from winter strong and ready to grow reminds us how resilient honey bees truly are.
With the right tools and preparation, your inspection can be smooth, efficient, and beneficial for both you and your bees.
Investing in quality beekeeping tools not only improves your experience but also helps ensure the long-term health and productivity of your hive.
🌿 At BeeNewz, we believe protecting bees means supporting the beekeepers who care for them. Every healthy hive helps sustain pollinators and our global food systems.
Discover more from Bee Newz
Subscribe to get the latest posts sent to your email.